Expenses: ALExpense and ALExpenseList
The ALExpenseList is a class that helps you ask a user about their different expenses.
Guiding Philosophy
Certain court forms ask for a person's expenses as a proof of hardship or burden. In designing this feature, we tried to reduce the number of questions a user needs to answer while still asking for specific enough expenses. We don't want to burden the user, but also don't want the user forget to list any significant expenses they would have that could prove financial burden.
What expenses you want to initially ask about will depend on your community's needs. For example, if your community lives in northern rural areas, they might have alternative heating needs, like wood or oil, and might not immediately associate those costs with standard "utilities". If your community is in a flood plain, you might want to include flood insurance as an option.
ALExpense
If you want to jump right in, check out a live demo of the ALExpense feature.
ALExpense is a class that represents an amount that re-occurs periodically, like a monthly
utility bill, or weekly grocery expenses. It has a few attributes:
expense.valueis the actual amount that is reoccurring. For example, someone's rental insurance might always be $50 each month.expense.times_per_yearis the number of times each year that this amount occurs. If someone has to pay their landlord twice a month,times_per_yearwould be 24. This value can also be fractional if need be; an expense that only needs to be paid once every two years would have atimes_per_yearof 0.5.expense.sourceis the source, or name, of the expense. Food expenses could have a source of"food".expense.display_nameis the name of the source that you want to display to the user. This helps with multi-lingual interviews, where you can show the user the name of the expense, but your interview logic can still refer to a single canonical language name. It also helps add or change additional context to the name that you don't want to write out in your interview logic. For example,expense.sourcecould be"medical insurance", butexpense.display_namecould be"Medical Insurance (including health, dental, and vision)".
You won't be using ALExpense by itself often though; you'll need a list of expenses from the user, which we'll discuss next.
ALExpenseList Tutorial
Let's make a short interview that just asks for someone's expenses. These some pieces of code can be used in longer interviews as well.
Before
Before you start, we'll assume that you:
- have access to a developer account on a docassemble server
- have the
AssemblyLinepackage installed on your server, or have installed theALToolboxpackage separately. - know what the playground is and how to use it to develop a docassemble interview
- know what "blocks" are in docassemble
Writing the interview
First, include the al_income.yml YAML file in your interview. This will
let you use the al_income questions and python code.
include:
  - docassemble.ALToolbox:al_income.yml
Then, create an ALExpenseList using a objects block.
objects:
  - expenses: ALExpenseList.using(auto_gather=False, complete_attribute="exists")
You can also associate these expenses with another object, say the main user of a form, like users[0], depending on how you organize your interview.
objects:
  - users[0].expenses: ALExpenseList.using(auto_gather=False, complete_attribute="exists")
Then to trigger gathering expenses, add the following interview order code block into your tutorial interview.
mandatory: True
code: |
  expenses.gathered
This will ask the user a few questions:
-
First, they will be asked what types of expenses they have. You can customize the options shown to the user by including a definition of an
expense_termsvariable in your interview. Since the default list is pretty long, we'll make it shorter in this tutorial by copying the below variable definition block:# "!!omap" makes these terms ordered:
# their order here will be their same order when shown to users.
variable name: expense_terms
data: !!omap
- rent: "Rent"
- mortgage: "Mortgage"
- food: "Food"
- utilities: "Utilities"
- clothing: "Clothing"
- credit cards: "Credit Card Payments"
- property tax: "Property Tax (State and Local)"
- other taxes: "Other taxes and fees related to your home"
- medical: "Medical costs (including insurance)"
- transportation: "Transportation costs"
- other: "Other"Here is what this question screen will look like:
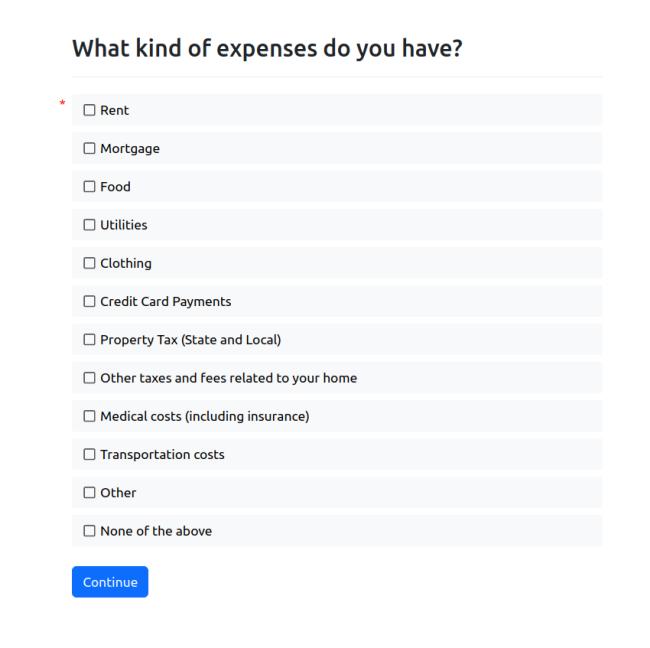
display_nameAs mentioned in the previous section,
expense_termsprovides theALExpenseobjects in yourALExpenseListwith the values forsourceand fordisplay_name; everything to the left of the colon on each line issourceand everything to the right is the longerdisplay_name. -
For each expense that the user said they have, there will be one question screen, asking for how often they pay for that expense, and how much they pay. If they selected "other", they will also be prompted to enter the name of that expense.
If you want to change the options for how often they pay the amount, you can define a
times_per_year_list, similarly to theexpense_termsabove. By default, the list contains "weekly", "once every two weeks", "twice per month", "monthly", "once every 3 months", "once every 6 months", and "yearly". For this tutorial, let's make that list a little shorter. Add the below block to your code:variable name: times_per_year_list
data:
- [52, "Weekly"]
- [26, "Once every two weeks"]
- [24, "Twice per month"]
- [12, "Monthly"]
- [1, "Yearly"]
You can show let the user review the expenses they've entered with the following question block:
id: expenses review
question: |
  Review your expenses
subquestion: |
  Here is what you've told us about your monthly expenses. You can add more or continue
  to the next question.

  ${ expenses.table }

  ${ expenses.add_action() }
field: review_expenses_screen
You can also add the expense list to a review screen with the below code:
review:
  - Edit: expenses.revisit
    button: |
      **Expenses**:

      % for item in expenses:
      * ${ item.display_name }: ${ currency(item.value) }
      % endfor
That's all you need to gather the information, but the ALExpenseList class also
gives you many ways to display the info. This is the same way of displaying the ALIncomeList class, so if you've used ALIncomeList before feel free to skim through this section.
Let's add one last screen to display our information. We'll describe what each line of code is doing on the screen.
event: final_screen
question: Summary of your expenses
subquestion: |
  All of the types of expenses, which we call "sources": ${ expenses.sources() }

  Sum of all of the expenses (by default, this is annually): ${ currency(expenses.total()) }

  Sum of all of the expenses over a month: ${ currency(expenses.total(times_per_year=12)) }

  Value of expenses with the source "rent": ${ currency(expenses.total(source="rent")) }

  Sum of just some expenses: ${ currency(expenses.total(source=["rent", "food", "mortgage"])) }

  Sum of all expenses except a specific source: ${ currency(expenses.total(exclude_source="food")) }
With that last screen, we can change our mandatory code block above to now be:
mandatory: True
code: |
  expenses.gathered
  review_expenses
  final_screen
Now you can run through the interview!
Click this section to see the whole interview
include:
  - docassemble.ALToolbox:al_income.yml
---
objects:
  - expenses: ALExpenseList.using(auto_gather=False, complete_attribute="exists")
---
variable name: expense_terms
data: !!omap
  - rent: "Rent"
  - mortgage: "Mortgage"
  - food: "Food"
  - utilities: "Utilities"
  - clothing: "Clothing"
  - credit cards: "Credit Card Payments"
  - property tax: "Property Tax (State and Local)"
  - other taxes: "Other taxes and fees related to your home"
  - medical: "Medical costs (including insurance)"
  - transportation: "Transportation costs"
  - other: "Other"
---
mandatory: True
code: |
  expenses.gathered
  review_expenses
  final_screen
---
id: expenses review
question: |
  Review your expenses
subquestion: |
  Here is what you've told us about your monthly expenses. You can add more or continue
  to the next question.

  ${ expenses.table }

  ${ expenses.add_action() }
field: review_expenses
---
event: final_screen
question: Last screen!
subquestion: |
  All of the types of expenses, which we call "sources": ${ expenses.sources() }

  Get the sum of all of the expenses (by default, this is annually): ${ currency(expenses.total()) }

  Get the sum of all of the expenses over a month: ${ currency(expenses.total(times_per_year=12)) }

  Get just the value of one expense: ${ currency(expenses.total(source="rent")) }

  Get the sum of all of the expenses, of just some sources: ${ currency(expenses.total(source = ["rent", "food", "mortgage"])) }

  Get the sum of all of the expenses, of everything but a specific source: ${ currency(expenses.total(exclude_source="food")) }
You'll likely want to display this information in a PDF or word template as well. This section describing the Attachment block will help with displaying information in the PDF, and this page about working with DOCX files will help DOCX users.