Assignment 1
Before you get started
We will discuss the first few sections of this assignment in class. To refresh your memory and reflect on your own, I recommend skimming the Overview of Docassemble, Description of YAML, and the section describing Mako. If you run into any trouble, please ask for help on the A2J Slack channel.
Watch the video below to learn how to create an account on our Docassemble server and on GitHub.com.
What is Docassemble?
Docassemble is a system for running interactive questionnaires. It uses several open source technologies, including Python, Markdown, YAML and docx-template to let you concentrate on writing your interviews and writing very little code. Yet, it's flexible enough to allow you to use advanced coding techniques when you need to do so.
Introduction to the Docassemble Playground
We will use the Docassemble playground for all exercises. Log in to your Docassemble server. When you are loggged in, click on your email address, and then select the Playground option to reach the Playground.
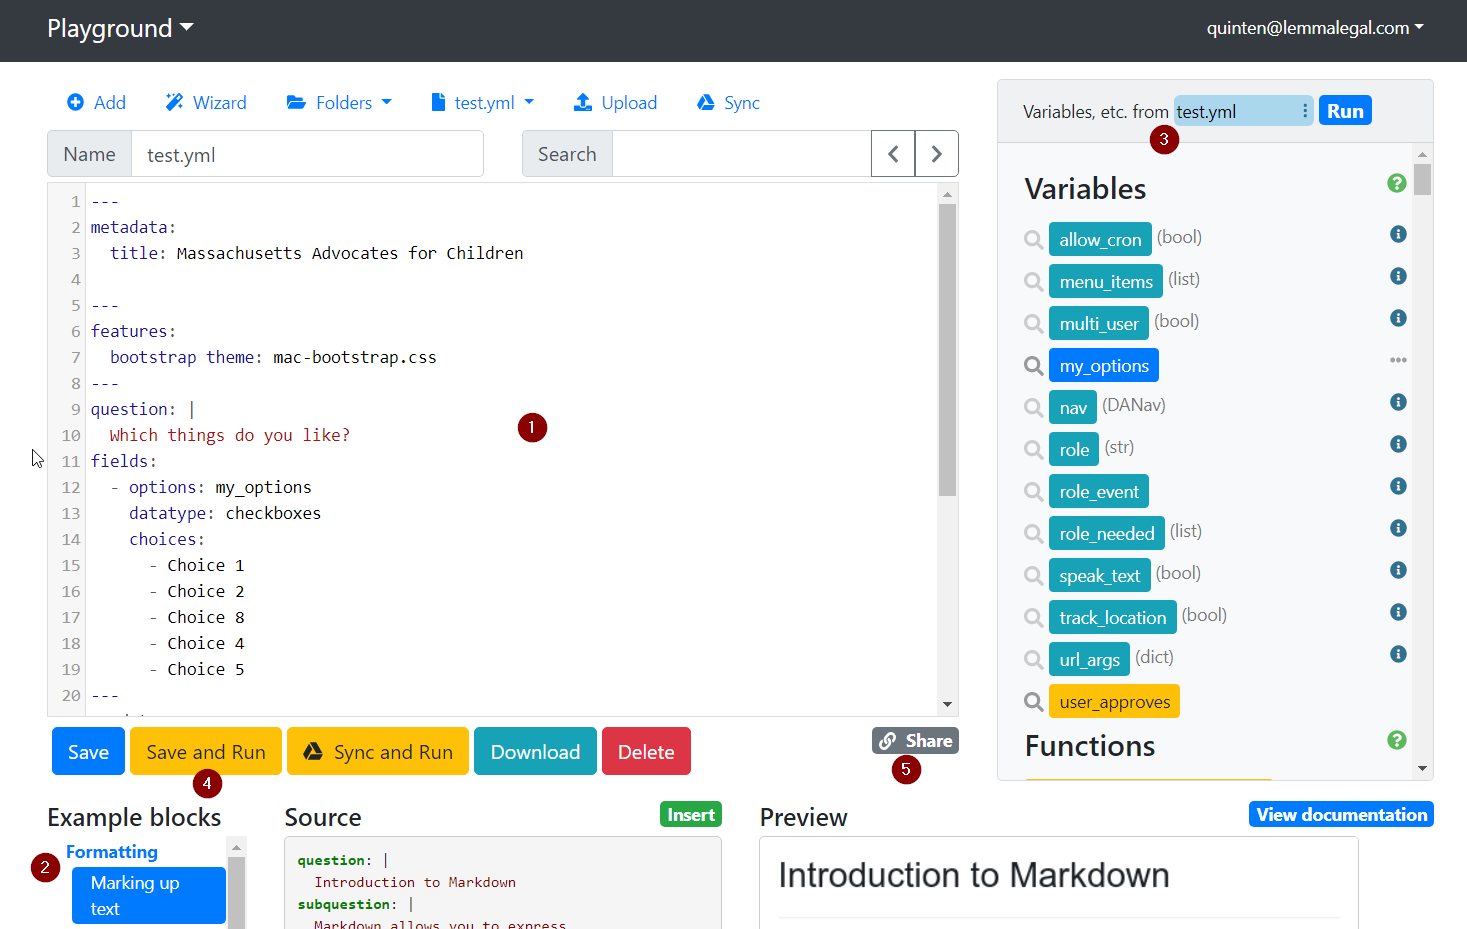
The Playground is made up of several elements.
- The main text editing window
- A list of example blocks that can be directly inserted into the text editing window
- A list of variables and functions available in the current interview file
- The save and run button, used to run the interview and view results.
- The share button which also gives you a link that can be shared
Hello, World
In computer programming, the traditional first exercise in a new programming language is to display the text "Hello, World."
Baby steps
Let's erase the text in the playground and replace it with the text below:
question: Hello, World
Docassemble interviews contain a series of specifiers followed by text, such
as the question specifier. The question specifier tells docassemble that
what follows will be the title of a screen displayed to the user.
When you save and then run this sample, you will notice an error.
Error
Docassemble has finished executing all code blocks marked as initial or mandatory, and finished asking all questions marked as mandatory (if any). It is a best practice to end your interview with a question that says goodbye and offers an Exit button.
The mandatory specifier
Take a minute to read the error message. In Docassemble, your interview can
contain many questions and branches that are never shown to the user. This error
is telling us that none of the questions are marked as mandatory, or
required, so Docassemble doesn't know what to display. Let's fix that.
question: Hello, World
mandatory: True
The mandatory specifier marks this block as required. Now when we run the
interview, we'll see the text "Hello, World" on the screen without any errors.
Note: you should normally have only ONE
mandatoryblock in a single interview. We'll discuss good practices around this later.
Introducing variables
The purpose of Docassemble is to gather information from the users. Let's ask the user's name so we can greet them personally.
question: Hello, ${user_name}
mandatory: True
---
question: What is your name?
fields:
  - Name: user_name
We introduced several new ideas in this interview. Notice that each screen in
the interview is separated by three dashes, like this: ---.
We introduced a new specifier, fields. Instead of single line of text, this
specifier takes a list. Each field in the list is indented and begins with a
single dash, like this: -. Each item has a label, followed by a colon,
followed by the name of the variable that the user's input will be assigned to.
To learn more about the format of a Docassemble interview, read the section on the YAML format.
We also introduced variables. A variable is simply a placeholder. user_name
is a variable that is a placeholder for the user's name. Inside the Docassemble
interview, we can display a variable by surrounding it with Mako tags, like
this: ${variable_name}.
Note: We don't need to tell Docassemble to mark the second question as mandatory. Because the mandatory question requires the variable
user_name, Docassemble automatically asks the first question that provides a definition.
Introducing logic
Sometimes you want to answer a question with some logic rather than directly asking the user for information.
Docassemble uses Python, a powerful but easy to read programming
language to control logic inside an interview. Python statements go inside a
code block.
---
code: |
  # This is a comment. notice that we assign a value with =, and we test a value with ==
  if user_name == "Scotty":
    secret_message = "Beam Me Up, Scotty"
  else:
    secret_message = "No message to report."
---
question: |
  Hello, ${user_name}
subquestion: |
  ${secret_message}
mandatory: True
---
question: |
  What is your name?
fields:
  - Name: user_name
In the example above, we introduced the use of the | line continuation marker,
or vertical pipe. We always use this when the text that follows could go on
multiple lines, and to handle special characters (like accented letters). You
also always use it for a code block.
We also introduced the subquestion specifier. subquestion is used for longer
explanation text on a screen. It uses a smaller font that is not bold.
Sometimes you don't want to use logic to create a new variable. You can use
simple Python code right inside a question or subquestion block, although the
syntax is very slightly different.
---
question: Hello, ${user_name}
subquestion: |
  % if user_name == 'Spock':
  Live long and prosper.
  % endif
mandatory: True
---
question: What is your name?
fields:
  - Name: user_name
Notice that inside a question block, the line with the if statement starts
with %. We also need to use an endif statement, instead of using indentation
to show the beginning and end of the if statement.
Note: YAML is picky about indentation. If you run into an error, check to make sure each line is indented the same way as the example above.
Your assignment
- Modify the Hello, World exercise so that it ask for the user's first and last names separately.
Working with GitHub
One of the powerful features of Docassemble is its integration with GitHub. GitHub is like track changes on steroids. It helps people work in teams and to let an individual keep track of the history of a project, which is important for solving bugs.
The DocAssembly Line use GitHub.
Watch this video again to learn how to create a GitHub account.
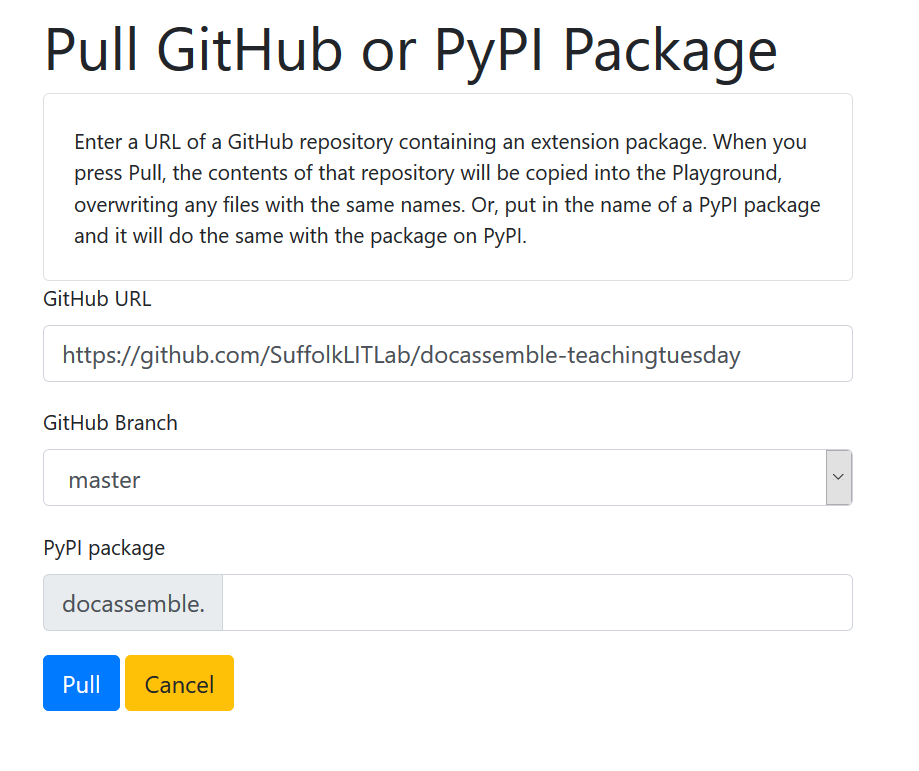
For our exercise today, we'll work with this repository.
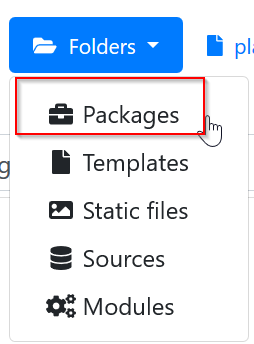
In the Playground, visit the Packages folder.
Pull the repository into the playground.
Click back. Switch to the file plain_language_experiment.yml. Edit the text in
the Playground, following the instructions that are right in the file.
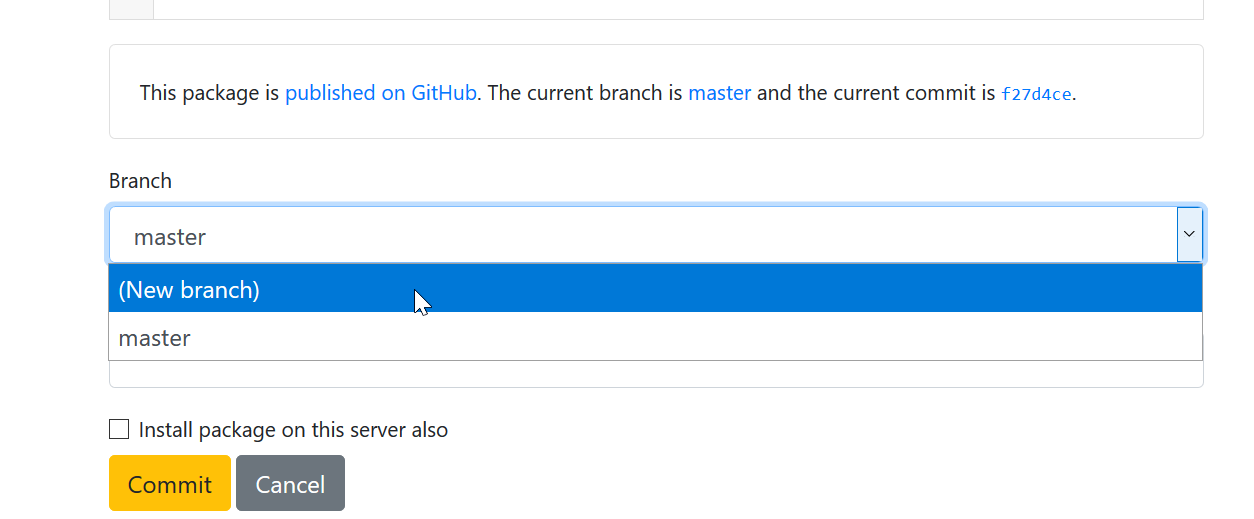
Go back to the Packages menu. Now, you can click the Github button to add your changes back on the repository. Make your changes in a new branch. Add your github username to the branch name. Branch names can include hyphens, but not spaces.
Add a brief "commit message". A commit message is a short note that explains what you changed since the last time you sent code to GitHub in this repository.
Click the "Commit" button to send your changes to GitHub.